Dental Sealants: Materials, Techniques, and Clinical Application
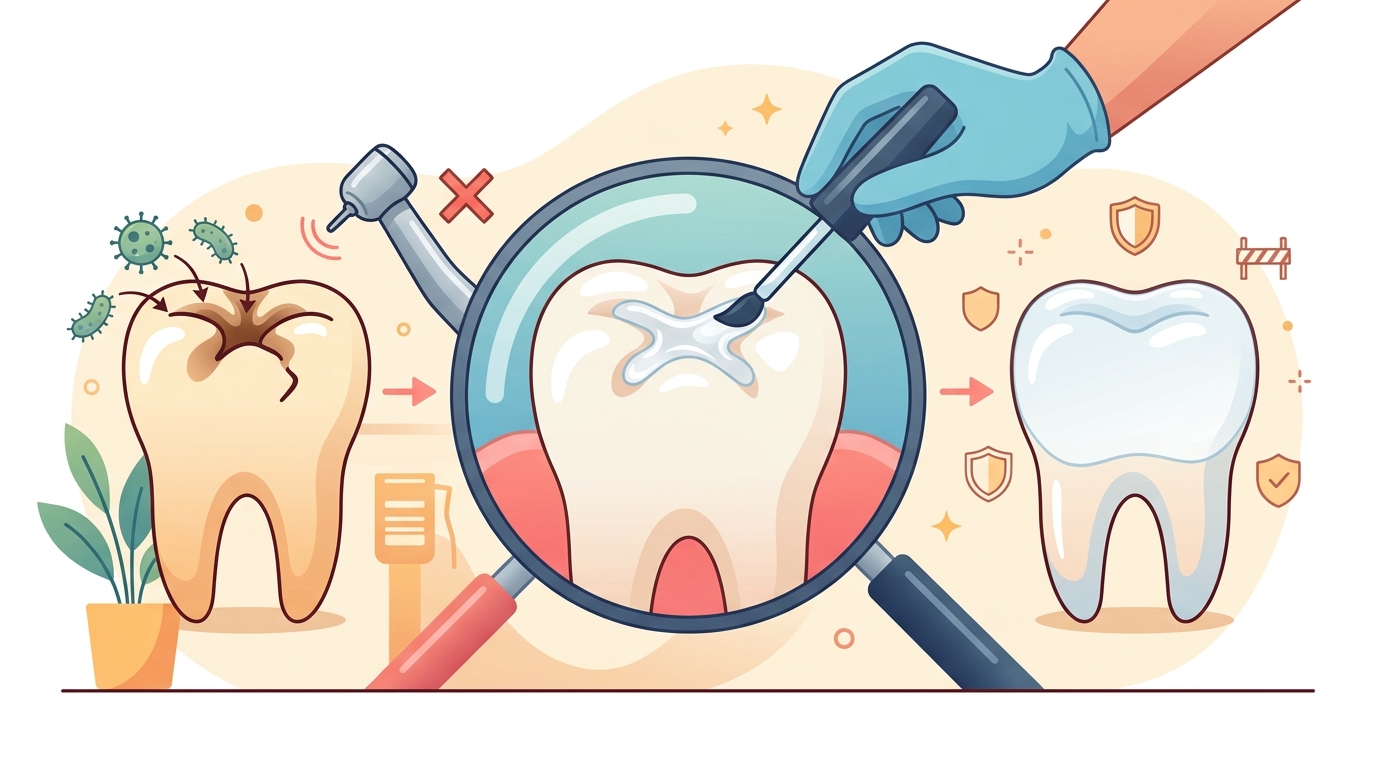
Introduction to Preventive Dentistry
- Preventive dentistry aims to halt the caries process before restorative intervention is required.
- Dental sealants are a highly effective, noninvasive preventive measure.
- They represent a primary prevention strategy against pit and fissure caries.
- Sealants complement fluoride therapy, which primarily protects smooth enamel surfaces.
Emphasize to candidates that sealants and fluoride are partners in prevention; one targets fissures, the other targets smooth surfaces.
Welcome to this advanced clinical lecture focusing on the comprehensive principles and techniques of dental sealants, as detailed in the fourteenth edition of Modern Dental Assisting. For the expert dental assistant, expanding one's knowledge beyond the mere procedural steps is vital for clinical excellence. Today, we will explore the intricate biomechanics, materials science, and precise clinical protocols that define successful sealant placement. To understand the critical nature of dental sealants, we must first examine the anatomical vulnerabilities of the human dentition. The occlusal surfaces of posterior teeth, specifically the molars and premolars, are characterized by a complex topography of developmental pits and fissures. These anatomical features are formed during amelogenesis when the lobes of enamel fuse. Often, this fusion is incomplete, leaving deep, narrow, and sometimes tortuous microscopic invaginations that extend deep into the enamel, occasionally reaching the dentinoenamel junction. From a microbiological perspective, these fissures are the perfect ecological niche for cariogenic bacteria, primarily Streptococcus mutans and Lactobacillus species. The dimensions of these fissures are frequently narrower than a single toothbrush bristle, rendering mechanical plaque removal nearly impossible for the patient. Furthermore, while systemic and topical fluorides are highly efficacious in remineralizing smooth surface enamel, their effectiveness is significantly diminished in these deep fissures due to limited fluid exchange and the constant presence of a mature cariogenic biofilm. Consequently, it is estimated that the vast majority of carious lesions in the pediatric and adolescent populations occur in these specific areas. The preventive philosophy in modern dentistry dictates that we must proactively intervene to protect these vulnerable surfaces. This brings us to the advent and evolution of pit and fissure sealants. The concept of prophylactic odontotomy, or the mechanical preparation and filling of susceptible fissures, was introduced in the early twentieth century. However, this approach violated the principle of conservative dentistry by removing healthy tooth structure. The monumental breakthrough came with the development of acid-etching techniques by Dr. Michael Buonocore in the nineteen-fifties, followed by the formulation of bisphenol A-glycidyl methacrylate, or bis-GMA, by Dr. Rafael Bowen. These two innovations allowed for the micro-mechanical adhesion of a fluid resin to the enamel surface, physically obturating the pits and fissures without the need for mechanical preparation. By creating an impenetrable physical barrier, the sealant isolates the microscopic anatomy from the oral environment, depriving any residual entrapped bacteria of their essential fermentable carbohydrate substrate. When placed correctly and maintained intact, sealants are nearly one hundred percent effective in preventing occlusal caries. As dental assistants, particularly those with expanded functions who may legally place these materials in various jurisdictions, a profound understanding of these foundational principles is essential. Your role transitions from assisting to performing a critical, technique-sensitive preventive procedure that has a lasting impact on the patient's oral health trajectory.
Moving into patient selection, the decision to place a dental sealant is no longer dictated solely by the patient's age or the eruption status of the teeth, but rather by a comprehensive, evidence-based caries risk assessment. The fourteenth edition emphasizes that while children and adolescents are the traditional demographic for sealants due to the recent eruption of their permanent molars, indications have broadened significantly. The primary clinical indication for sealant placement is a deep, narrow, or irregular pit and fissure morphology on a tooth that is fully erupted enough to allow for adequate moisture control. Eruption status is critical; if the operculum still partially covers the distal marginal ridge of a newly erupted molar, isolation becomes exceptionally challenging, and the risk of gingival crevicular fluid contamination compromises the entire adhesive process. However, if isolation can be achieved, early sealing is highly beneficial. Beyond morphology, we must evaluate the patient's individual caries risk. Factors elevating this risk include a history of previous carious lesions, poor oral hygiene, a highly cariogenic diet rich in fermentable carbohydrates, inadequate exposure to topical fluorides, and compromised salivary flow. Patients presenting with xerostomia, whether due to systemic conditions, autoimmune disorders like Sjogren's syndrome, or as a side effect of multiple medications, are at an exponentially higher risk for rapid caries progression and should be strongly considered for sealants, regardless of their chronological age. Conversely, the expert practitioner must be equally adept at recognizing the absolute and relative contraindications to sealant placement. The most absolute contraindication is the presence of an overt, clinically evident, or radiographically detectable carious lesion that extends into the dentin. Sealing over an active dentinal lesion is malpractice, as the decay will silently progress beneath the restoration, eventually compromising the pulp. Another significant contraindication is the presence of proximal carious lesions on the same tooth. If a tooth requires an interproximal restoration, the occlusal preparation will invariably incorporate the pit and fissure system, rendering a separate sealant procedure redundant and clinically illogical. Furthermore, teeth with shallow, well-coalesced, and easily cleansable pits and fissures do not require sealants. Subjecting a tooth with self-cleansing anatomy to an acid-etching procedure provides no preventive benefit and merely wastes clinical time and resources. Finally, a practical yet paramount contraindication is the inability to achieve absolute isolation. If patient cooperation is lacking, or if anatomical or physiological factors such as a hyperactive tongue or copious salivary flow preclude a completely dry field, the application of a traditional resin-based sealant is contraindicated. In such scenarios, the placement of a moisture-tolerant glass ionomer sealant may be utilized as a provisional or transitional measure until a definitive resin sealant can be successfully applied. Thorough patient assessment and meticulous clinical judgment are the cornerstones of successful preventive therapy.
To master the clinical application of dental sealants, one must possess a sophisticated understanding of the materials science underpinning these resins. The majority of commercially available and clinically successful pit and fissure sealants are derived from the bisphenol A-glycidyl methacrylate, or bis-GMA, resin monomer, or the closely related urethane dimethacrylate, UDMA. These monomers form the synthetic resin matrix of the sealant. Bis-GMA is intrinsically highly viscous, meaning it is too thick to flow adequately into the microscopic confines of a narrow fissure. Therefore, manufacturers dilute this matrix with lower molecular weight monomers, such as triethylene glycol dimethacrylate, or TEGDMA, to lower the viscosity and improve the flow characteristics. This carefully calibrated rheology allows the material to exhibit high wettability, spreading effortlessly across the etched enamel surface and infiltrating the microscopic pores via capillary action before polymerization occurs. A critical distinction in sealant formulation is the presence or absence of inorganic filler particles. Sealants are classified as either filled or unfilled resins, and this distinction dictates their physical properties and clinical handling. Unfilled sealants consist almost entirely of the resin matrix. Because they lack filler, they are exceptionally fluid and penetrate fissures deeply. Crucially, unfilled sealants exhibit a lower resistance to abrasion. This is a deliberate design feature: if an unfilled sealant is placed slightly high in occlusion, the natural forces of mastication will rapidly wear away the excess material within a few days, self-adjusting without causing occlusal trauma. Filled sealants, on the other hand, contain microscopic particles of glass, quartz, or silica. To ensure these inorganic fillers bond to the organic resin matrix, they are coated with a silane coupling agent. The addition of filler particles significantly increases the material's viscosity, its compressive strength, and its resistance to wear. Consequently, filled sealants are more durable over time, particularly in patients with heavy occlusal forces or bruxism. However, this enhanced durability necessitates that the practitioner meticulously check the occlusion with articulating paper after placement. If a filled sealant is high, it will not wear down quickly; it must be mechanically adjusted using a rotary instrument, such as a round finishing bur, to prevent occlusal interferences and subsequent periodontal ligament inflammation. Beyond filler content, practitioners must select the appropriate color formulation. Sealants are manufactured in clear, tinted, and opaque white variations. While clear sealants may offer superior aesthetics, they present a significant disadvantage during both placement and long-term recall examinations. An opaque white or subtly tinted sealant provides stark visual contrast against the natural tooth structure. This contrast is invaluable for the clinician to verify complete coverage of the fissure system during application, to identify and remove small air bubbles before curing, and to evaluate the retention of the sealant during subsequent recare appointments. Some modern formulations even incorporate photo-chromatic technology, appearing brightly colored, such as pink or green, during placement to ensure accuracy, and then transitioning to a natural, translucent white upon exposure to the curing light. Understanding these material properties allows the expert assistant to select the optimal product based on the patient's specific clinical presentation and the functional demands of the dentition.
Once the sealant material is adapted to the tooth, it must undergo polymerization, which is the chemical process by which the individual, fluid resin monomers cross-link to form a solid, durable three-dimensional polymer network. Dental sealants are classified into two broad categories based on the method utilized to initiate this polymerization reaction: autopolymerizing, commonly known as self-cured, and photopolymerizing, known as light-cured. Expert clinical assistants must grasp the underlying chemistry and the practical advantages and limitations of each system. Autopolymerizing sealants are supplied as a two-component system, typically a base and a catalyst. The base contains the resin monomers and a chemical accelerator, usually a tertiary amine. The catalyst contains the resin monomers and a chemical initiator, typically benzoyl peroxide. When these two pastes or liquids are mixed together on a mixing pad, the tertiary amine reacts with the benzoyl peroxide to produce free radicals. These free radicals attack the carbon double bonds of the resin monomers, initiating a rapid chain reaction that links the monomers into a solid polymer. The primary advantage of self-cured sealants is that they require no specialized curing equipment, and the polymerization occurs completely throughout the material, independent of the depth or thickness of the placement. However, they present significant clinical drawbacks. The mixing process inevitably incorporates microscopic air bubbles into the material, which can result in surface voids that harbor plaque or compromise the structural integrity of the sealant. More importantly, the operator has a strictly limited working time, typically about one minute, before the material begins to gel and lose its ability to flow into the fissures. The setting time is approximately two minutes, meaning the tooth must be maintained in absolute isolation for an extended period, which can be exceedingly difficult in pediatric dentistry. In stark contrast, photopolymerizing or light-cured sealants have become the gold standard in modern dental practice. These are single-component systems that do not require mixing, thereby eliminating the introduction of air bubbles and minimizing material waste. The resin matrix contains a photoinitiator, most commonly camphorquinone, which is sensitive to visible blue light in the wavelength range of four hundred to five hundred nanometers. The system remains fluid and completely workable as long as it is shielded from intense ambient light. This affords the clinician unlimited working time to meticulously apply the sealant, coax it into deep fissures using an explorer, and draw out any trapped air bubbles before commanding the material to set. Once the clinician is satisfied with the placement, a high-intensity dental curing light is directed onto the material. The photons from the blue light activate the camphorquinone, generating the free radicals that rapidly initiate the polymerization chain reaction. The setting time is reduced to a mere ten to twenty seconds per surface, significantly decreasing the required duration of strict moisture control. The primary limitation of light-cured systems is that the curing light must physically reach all parts of the resin. If the sealant is placed too thickly, or if the light guide is positioned incorrectly, the deepest layers of the material may not receive adequate photon density, resulting in a partially cured, structurally weak layer at the interface with the tooth. Therefore, precise placement technique and optimal positioning of the curing light are mandatory for clinical success.
The fundamental mechanism that allows a dental sealant to remain adhered to the smooth, inherently non-retentive surface of a tooth is micro-mechanical retention. This retention is achieved exclusively through the meticulous acid etching of the enamel. Understanding the histological and physiochemical changes that occur during this phase is crucial for the expert dental assistant, as etching is arguably the most critical and technique-sensitive step in the entire procedure. The standard etchant used in dentistry is a gel or liquid containing thirty-seven percent phosphoric acid. Enamel is composed primarily of inorganic hydroxyapatite crystals arranged in tightly packed enamel rods or prisms. When the highly acidic phosphoric acid, which has a pH of approximately one, contacts the enamel surface, it rapidly initiates a process of controlled demineralization. The acid selectively dissolves the core of the enamel rods, the periphery of the rods, or a combination of both, depending on the orientation of the crystals. This process removes the outer layer of prismless enamel and the salivary pellicle, exposing the structured rod patterns beneath. More importantly, the acid dissolution creates a microscopically rough, porous topography across the enamel surface, characterized by millions of microscopic voids, pits, and channels that extend several micrometers deep into the tooth structure. These microscopic porosities are clinically referred to as enamel tags or micropores. Simultaneously, the etching process drastically alters the surface energy of the tooth. Unetched enamel has a low surface energy and is relatively hydrophobic. Etching removes surface contaminants and leaves a highly reactive, high-surface-energy enamel surface. When the fluid, low-viscosity resin sealant is subsequently applied, the high surface energy of the etched enamel acts like a microscopic sponge, pulling the resin into the micropores via powerful capillary forces. Once the resin is cured, it forms microscopic solid projections, known as resin tags, which interlock inextricably with the enamel tags. This intricate micro-mechanical interlocking provides a formidable bond strength capable of withstanding the rigorous shear and tensile forces of mastication. The clinical protocol for etching requires precision. The etchant is carefully extruded directly into the pits and fissures, extending slightly beyond the anticipated margins of the sealant to ensure that all resin rests on properly prepared enamel. The material is left undisturbed for fifteen to thirty seconds, depending on the manufacturer's specific instructions and the condition of the tooth. Heavily fluoridated enamel or the primary dentition may require a slightly longer etching time due to a higher resistance to acid dissolution. It is imperative that the etchant is merely placed, not rubbed, as rubbing can fracture the delicate, newly formed enamel tags and compromise the bond. Following the designated dwell time, the etchant must be thoroughly rinsed away with a robust stream of water and high-volume evacuation for at least ten to fifteen seconds. The microscopic channels created by the acid are filled with dissolved calcium and phosphate salts, which must be completely flushed away to clear the path for the resin. Finally, the tooth must be dried meticulously with compressed air that is free of oil and moisture contaminants. A properly etched and dried enamel surface will exhibit a distinct chalky, frosty white, opaque appearance. If this frosty appearance is absent, the tooth has not been adequately etched, and the process must be repeated. Failure to achieve and maintain this pristine etched surface will inevitably result in early sealant failure.
The clinical sequence for placing a dental sealant requires an orchestration of preparation, absolute isolation, and precise material handling. As an expert clinician, you must execute each step with an acute awareness of the potential pitfalls that lead to microleakage and retention failure. The procedure commences with meticulous tooth preparation. The pits and fissures must be completely free of debris, plaque, and pellicle to allow the etchant to contact the enamel directly. The fourteenth edition recommends cleaning the occlusal surface with a slurry of plain, non-fluoridated pumice and water, delivered via a bristle brush or a rubber cup in a slow-speed handpiece. It is paramount to avoid commercial prophylaxis pastes containing fluoride, oils, or flavoring agents, as these substances can leave a microscopic residue that acts as a barrier, drastically inhibiting the chemical action of the phosphoric acid and reducing the bond strength of the resin. Alternatively, modern practice often employs air polishing systems utilizing sodium bicarbonate or aluminum oxide powder, which effectively cleans the deep fissures without leaving any detrimental residue. Once the tooth is pristine, the most formidable challenge of the procedure begins: maintaining absolute isolation. The enemy of adhesive dentistry is moisture, specifically saliva. Saliva is rich in glycoproteins that form a tenacious pellicle over any exposed surface almost instantaneously. If even a microscopic drop of saliva contacts the frosty, etched enamel surface before the sealant is applied, the high-surface-energy micropores are immediately plugged by salivary proteins. This contamination completely obliterates the potential for micro-mechanical retention. Drying the tooth with air after salivary contamination is futile; the proteins remain firmly lodged in the pores. If contamination occurs, the clinician must re-etch the tooth for ten to fifteen seconds to remove the contaminated layer. To prevent this, robust isolation is mandatory. While the dental dam provides the undisputed gold standard for absolute moisture control, its use for multiple sealants in young, anxious patients can be clinically challenging and time-consuming. Therefore, expertly managed cotton roll isolation, often supplemented with absorbent parotid shields commonly known as dry angles placed over Stensen's duct in the buccal mucosa, is the most frequently employed technique. The use of a high-volume evacuator positioned precisely by an auxiliary is crucial. When working independently, the expanded function assistant must master the use of specialized isolation devices, such as the Isolite or similar intraoral vacuum isolation systems, which simultaneously retract the tongue, shield the buccal mucosa, and provide continuous suction, creating an impeccably dry operating field. With the tooth isolated, cleaned, etched, rinsed, and dried to a frosty finish, the sealant material is applied. The key to application is conservative volume. The goal is to hermetically seal the pits and fissures, not to obliterate the occlusal anatomy. Using the manufacturer's delivery system, typically a micro-syringe with a remarkably fine disposable tip, the fluid resin is allowed to flow gently into the depths of the fissures. The expert clinician avoids actively injecting the material under pressure, which can introduce air bubbles. Instead, the material is teased along the grooves. A micro-brush, an endodontic file, or the tip of a dental explorer is then delicately drawn through the dispensed sealant. This critical step breaks the surface tension of the resin, coaxing it into the deepest, narrowest crevices of the fissures and dragging any trapped air bubbles to the surface where they can be popped. Air bubbles incorporated within the sealant body will create structural voids, leading to fracture under occlusal loading. If a bubble is left at the margin, it creates a pathway for microleakage and subsequent recurrent decay. Once the material is perfectly adapted and visually inspected for voids, polymerization is initiated. The tip of the light-curing unit must be positioned as close to the sealant surface as physically possible without touching the uncured resin. This proximity is vital because light intensity diminishes exponentially as the distance from the source increases, a principle known as the inverse square law. A distance of just a few millimeters can significantly reduce the irradiance reaching the deep resin, resulting in an inadequate depth of cure, leaving a soft, unpolymerized base beneath a deceptively hard surface. The light guide should be held perpendicular to the occlusal surface to maximize photon penetration. The standard curing time is twenty seconds per surface, though the clinician must adhere to the specific instructions for their curing unit and material, recognizing that darker, opaque, or heavily filled sealants may require extended curing times due to decreased light transmission through the material.
Following the polymerization cycle, the clinical procedure is not yet complete. A rigorous post-placement evaluation must be conducted to verify the integrity and functionality of the newly placed restoration. The clinician first utilizes a sharp dental explorer to meticulously tactilely examine the entire margin of the sealant. The explorer tip should glide smoothly from the unetched enamel onto the sealant surface without catching. Any discrepancy at the margin indicates either poor adaptation of the material or the presence of a subsurface air bubble that has been unroofed. The surface of the sealant must also be probed to ensure it is uniformly hard and thoroughly cured. If any soft, tacky areas are detected beneath the oxygen-inhibited layer, it signifies incomplete polymerization, necessitating additional light curing or, in severe cases, removal and replacement. The oxygen-inhibited layer itself, a microscopic, sticky film of uncured resin on the very surface of the sealant caused by the interaction of the monomers with ambient oxygen, is a normal byproduct of the chemical reaction and can simply be wiped away with a moist cotton pellet. Next, the patient's occlusion must be evaluated. The isolation materials are removed, and the patient is instructed to bite down gently on a piece of articulating paper. The patient should be asked to perform both centric occlusion and lateral excursive movements. The clinician then examines the occlusal surfaces for intense, isolated colored marks on the sealant, which indicate premature contacts or high spots. As discussed previously in the context of materials science, the response to a high spot depends entirely on the type of sealant utilized. If an unfilled sealant exhibits a minor high spot, mechanical adjustment is generally unnecessary; the patient's normal masticatory forces will abrade the excess resin within a few days, allowing the tooth to settle into its proper physiological occlusion without causing trauma to the temporomandibular joint or the periodontal ligament. However, if a filled sealant has been placed, its robust wear resistance mandates immediate intervention. The clinician must use a slow-speed handpiece equipped with a round white stone or a multi-fluted carbide finishing bur to precisely reduce the high spot until the articulating paper marks are evenly distributed across the natural tooth structure and the sealant, confirming harmonious occlusion. Finally, a professional application of topical fluoride should be administered. The etching process invariably affects the enamel immediately adjacent to the sealant margins, temporarily leaving it demineralized and vulnerable. A topical fluoride varnish or gel promotes rapid remineralization of these micro-porosities, restoring the structural integrity of the peripheral enamel and providing an additional layer of chemical protection against cariogenic attack.
The ultimate measure of a dental sealant's efficacy is its long-term retention and its ability to prevent carious lesions over the life of the tooth. Clinical studies consistently demonstrate that when strict protocols are followed, sealants can be retained for five to ten years, and often much longer. However, the expert assistant must understand the etiology of sealant failure. The vast majority of sealant failures, defined as the complete loss or partial debonding of the material, occur within the first three to six months post-placement. This early failure is almost exclusively attributable to an error in clinical technique, specifically inadequate moisture control and subsequent salivary contamination during the etching and placement phases. Other causes of early failure include insufficient etching time, failure to thoroughly rinse the etchant, or incomplete polymerization due to poor curing light positioning. When a sealant fails, it does not simply fall out; it often debonds partially, creating a microscopic gap between the resin and the enamel. This is a clinically dangerous scenario, as the gap acts as a trap for plaque biofilm and fermentable carbohydrates, actively promoting the rapid development of rampant, hidden caries beneath the remaining material. Therefore, vigilant postoperative maintenance is imperative. Sealants must be visually and tactilely inspected at every recare appointment. If a sealant is found to be partially lost or demonstrating marginal leakage, it requires immediate attention. The clinician does not necessarily need to remove the entire existing restoration. If the remaining sealant is firmly adhered and free of underlying caries, the area can be repaired. The adjacent enamel and the existing sealant are vigorously cleaned, re-etched, rinsed, and dried, and fresh sealant material is applied and cured over the defect. The chemical properties of the resin allow the new material to bond securely to both the freshly etched enamel and the microscopically roughened surface of the older composite resin. This concept of proactive maintenance ensures the continuous protection of the vulnerable occlusal anatomy.
Finally, we must address the legal, ethical, and occupational safety parameters surrounding the application of dental sealants. In many jurisdictions, the placement of pit and fissure sealants is a legally delegated duty for Expanded Function Dental Assistants or Registered Dental Assistants. This delegation represents a significant level of trust and responsibility transferred from the supervising dentist to the auxiliary professional. It is the uncompromising ethical obligation of the expert assistant to possess an encyclopedic knowledge of their specific state or regional Dental Practice Act, as the level of required supervision, whether direct, indirect, or general, varies dramatically across different regions. Practicing beyond one's legally defined scope is a severe violation that can result in the loss of licensure. From an occupational safety perspective, handling unpolymerized resin materials requires strict adherence to infection control and personal protective equipment protocols. The acrylate monomers present in both the etchant resins and the sealant materials are known contact allergens. Repeated, unprotected dermal exposure to these liquid monomers can induce allergic contact dermatitis, a severe, delayed-type hypersensitivity reaction that can end a clinician's career. Therefore, the implementation of a strict no-touch technique is mandatory. Clinicians must wear high-quality, well-fitting nitrile gloves, as latex has been shown to be permeable to certain monomer formulations. Furthermore, the clinician and the patient must wear appropriate protective eyewear. The intense blue light emitted by modern LED curing units is hazardous to the retina and can cause permanent photic injury, specifically blue-light macular degeneration, with prolonged or unprotected exposure. Specially formulated amber-tinted safety shields or protective glasses must be utilized to filter out the specific wavelengths emitted by the curing wand. By mastering the intricate chemistry, the precise micromechanical techniques, the rigorous isolation protocols, and the safety considerations detailed in the fourteenth edition, the expert dental assistant elevates the simple act of placing a sealant into a sophisticated, highly effective, and entirely safe medical intervention that profoundly benefits the patient's long-term oral health.